WEAVERS ROTTEN PLANKS

by Peter Marsh
(Baildon)
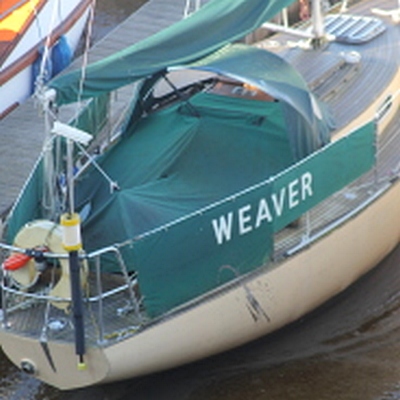
Removed paint where rot was most noticeable, as you can see from the photos a number of areas.

One area has gone right through to the ribs.

I am wanting to know how far to go back from the rotten area and also whether to remove the planks in that area.

Any help would be appreciated as I have said before I am total new to wooden boats, it's all a bit harrowing to me.

To date all the paint has been removed and I can now see the extent of the problems.

The rot amidships on both sides is due to water seeping past the stays and lodging behind the chain plates.

Forward planks are due to bad repairs done in the past, this has also affected the stem which is rotten in that area.

Without opening her up fully I have no idea what might be underneath, to scared to progress any further.

I have had a quote between £2000 3000 to repair which is way out of my remit.

I just don't know where to go from here as am no good at woodwork.

To be truthful I wished I had never bought her.

I am seriously thinking of selling her but I think that will be a problem as who would want a wooden project.

Very sad sailor.

Comments for WEAVERS ROTTEN PLANKS

Click here to add your own comments

Wonderful Site
by: Anonymous

Came across your site while researching repairing of my '57 Lyman 15.5" Runabout.

Have had it forever, and the last 15-20 years have been rough on it.

Doing the tap test quickly escalated into jabbing holes with my knife, and lots of poking to determine the extent of the rot.

All in all I have about 70-75% of a good boat.

I need to do about 10 planks about 1/2 to 2/3 length and a bunch of ribs.

Transom and keel seem solid, but really haven't dug that deep with the disassembly.

I can see I will be spending a good deal of time here.

Thanks for sharing your knowledge about this particular craft/skill.

Peace and Love!


Restoration
by: Peter

Well good news on Weaver, I have now got someone to repair her.

Further good news is that the majority of the hull is in really good condition.

Only a couple of ribs forward needs new stem and some new ply on the forward deck.
Renew about 8 planks.

They will make the stem and planks and come and fit them in a couple of weeks.

With good luck and fair weather she could be in the water by October.

I know there is a a lot of work but I am now excited that she will be restored to her former glory.


Alan DeForest March 21, 2013 at 5:09pm
by: Anonymous

Peter,

I have had the same dilemma when working on Salty. I thought I could keep some of the frames but after I got into them they were too far gone and I'm replacing them. As far as how far you go sometimes it’s hard to tell. I started digging into the keel after pulling the forward frames to spray with boric acid then apply penetrating epoxy. Soon the area became a shell of its former self and I just lopped the section out. Even after seeing what I think is good wood I'm going to soak again with boric acid then the epoxy before I scarph in a new section.

My take on good wood is when it starts to shave smoothly with a plane or chisel. The color should be fresh looking, it can't be punkie looking and resists a knife or ice pick at about 1/8th inch. Get some matching good wood and see how that behaves when working or poking it. I do have good wood on my boat and I give it a wrap with the handle end of a screwdriver and you can hear it ring. Then I compare with a suspect area. This is relatively good way as long as the two areas are structurally similar.

After you do cut it back it should be treated with an anti-fungicide. I bought some on line and mixed it with water and spray or soak the area. The spores are there and they need to die!

That’s what I do, but remember I am a novice too and hopefully others on this site will chime in to help. I’d like to hear their suggestions.

Al


Mike March 20, 2013 at 7:14pm
by: Anonymous

Hi Peter,

Great to see you getting down to it.

Cutting away all the rot is often the part that takes the most courage.

Your next job should be to replace that rib.

But in the meantime splash some antifreeze around especially on the end-grain of the planks to make sure that any stray rot spores are killed off.

Did you keep any of the old planking to use as templates?

Don’t worry if you didn’t, you can always get a rough idea of the shape of each plank from the other side of the hull.

You won’t need to replace the whole plank just the parts you have cut away.

However, you should stager the joints, so they are not in a vertical line, so a wee bit more to cut away.

But as I said, first thing is to replace that rib.

Great work,

Mike


Peter Marsh March 20, 2013 at 4:51pm
by: Anonymous

Hi Mike I have added some photos

Here are some photos of rotten planks I have removed pluse 1 rib. Can anyone help with how I replace with new ones. The first 2 planks amidships which is a continueation of the 2 I have removed from the bow are also rotten. do I replace the whole planks and if so how do I go about this.

I am not a carpenter so have no idea of where to start, help would be appreciated.


Mike February 19, 2013 at 11:59am
by: Anonymous

Hi Peter,

There is only one cure, cut it out all the rotten wood cut it right back into the good sound wood.

I'm afraid this is a situation where you will have to be ruthless.

Then treat the good wood to kill off any wood rot fungus and spores.

Where you need to replace a full width section of a plank this can be replaced using butt blocks.

So the plank needs to be cut back to a suitable position where the butt blocks can be fitted and preferably where the replacement will fasten to at least one frame/rib.

If you need to replace parts of adjacent planks try to stagger the butt blocks so that you don’t have one directly above the other.

Glued scarf joints would be nice but it is so much easier to cut the existing sound plank square, fit a butt block and caulk as per normal.

There are various methods for making a pattern of the replacement if necessary.

If all that is needed are plank edges these can be repaired by gluing in a "dutchman".

The reason for cutting the plugs on an angle is that they glue better then gluing end grain.

Use a good quality timber that is as close to the original as possible and if you use epoxy to glue it you can also coat the new piece with epoxy to seal it and thus control the moisture content.


Previous Comments2
by: Mike

Alan DeForest October 30, 2012 at 1:48pm
Peter,
Aye, get the paint off and you'll get a better picture. The second to last issue of Wooden Boat had an article on glassing a boat and it is a huge undertaking to do it right. I was mulling around the idea for my project boat and decided to keep it original if for nothing else than saying I did it in the way of the past.
Good luck with your new project.
Al

Alan DeForest said…
Peter,
I've stripped house paint with a heat gun and it tough work. Sanding is noisy and dusty and you probably are dealing with lead paint. Solvents have their issues too. In my case with Salty I will be using a solvent. I am in a very residential setting and I want to have a minimum of noise and dust. The solvent, I think is best for me since I can apply it and scrap it off in a very controlled manner then right into the trash can. The fumes dissipate rapidly and I could just as well be stripping a dresser in the drive way - who could complain.
If you do go with the heat gun get a scraper with a long handle or blade to keep away from the heat. I had better luck with the scraper having a square edge so it didn't dig in. This was on the cedar siding on my house. Not much different from a boat side. If you play the heat just ahead of the blade you can get some long continuous swaths cleared.
Good Luck. Don't suck up too much fumes and smoke!
Al


Previous Comments
by: Mike

Mike October 25, 2012 at 8:49pm
Hi Peter,
First thing is to get that paint off so you can see for sure what the problem is.
In my view it is easier to replace wood than to properly glass a hull.
Besides glassing a traditional carvel hull is at best a temporary measure, unless you are prepared to wedge/spline all those seams and even then you’ve gotta replace any rotten wood first.
And doing a proper job of glassing an old hull is a lot more complicated than replacing bits of plank.
Cracks along the seams are normal as are the cracks along the edge of the transom, they are probably just cracks in the paint.
Where the paint is peeling could be some localised rot or nail sickness or even just damage that has been filled badly.
Might even just be the paint cracking where it’s getting old and there has been a build-up of layers.
You can get an idea of how sound the wood is by tapping it, any rotten areas will have a dull ring to them.
You say she was built in 1980, so I doubt if there is any nail sickness, Iroko is usually quite resilient to rot, the transom looks to be in reasonable condition but most of the dubious areas seem to be on the bow and along the sides, areas that tend to get twanged when mooring.
Perhaps the previous owner had problems parking?
But you won’t be sure until the paint is off and you have a good look and poke.
Get the blow lamp on her and if there is any rot cut it out and treat the surrounding good wood with anti-freeze before splicing in some new timber.
OK, a lot less effort to say than to do but doing it right is so much more satisfying then bodging her up with fiberglass.
And you know she is worth it.
Let us know how you get on.
All the best,
Mike

Mike October 24, 2012 at 9:53am
Good Morning Peter,
So glad you found the website of value.
And I am looking forward to hearing and seeing more about "Weaver", and you.
If "Weaver" was ever registered with Lloyds you can, for a small fee, ask for her past details.
Unfortunately they no longer issue the old ‘Blue Book’ any more, just a scrappy bit of A4.
I'm sure that you and "Weaver" are going to have a happy partnership.
Thanks,
Mike


Click here to add your own comments

Return to Your Comments.

Want to add more photos?

Photo Uploader

If you are having problems uploading Photos or would like to add more click on this link for the Upload Form.

Show / Hide