New Timber Windows

by Ben
(Cork, Ireland)

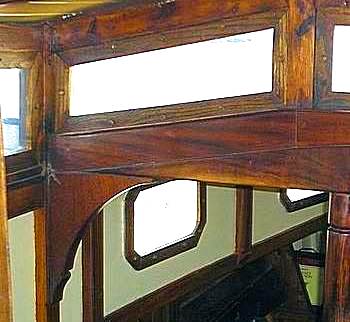
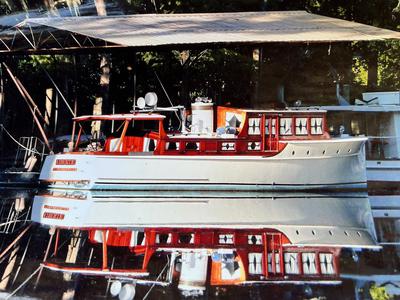
We are replacing the entire superstructure on our boat and will need new timber windows.

We do not have the money to buy new.

We are competent with a router and have access to good quality teak and would like to make the windows ourselves.

However we cannot find anywhere on the net with a tried and tested drawing of a window and frame for us to copy.

We would like to open some of them.

We would also like to try double glassed if that was possible.

We think that they should be fixed from the inside and designed so that they are serviceable.

Anyone any ideas or links.

We would spend money on a good book covering the subject if there was one

Thanks in advance

Ben

Comments for New Timber Windows

Click here to add your own comments

Timber windows
by: Joe

I am also looking to fit new timber framed windows in my boat.

If anybody can suggest a manufacturer that would be great.

I live in Ireland but happy to go further afield if necessary.

Thanks. joe dot griffin at ul dot ie

Making double glazed windows
by: Blue circle

We have just made double glazed window.

Anybody requiring photos or advice pls send email
My phone number 07876684480

Graham

Can I see the pictures please
by: Anonymous

I am fixing to build a narrowboat I require insulation, and double glazed windows for boats I cant find.

So, I want to make them my self as well and would really like to see yours.

wooden boat windows
by: Graham

We are making wooden windows for my boat.

I f you send me your email address I can send some photos.

They are constructed of Iroko and are double glazed.

We have fitted 2 and next month will fit the remaining 12

Graham

photos
by: alan

Hi, please could you produce photos of wooden windows under construction as the written text text is a bit confusing.
Regards A


teak windows
by: steve

Hi there,

Regarding windows I used to make them for a boat yard it’s not really that difficult.

Equipment required, upturned router on bench, bobbin sander for internal radius and vertical sander for outer radius.

First trace the window opening on 3mm mdf first template.

2nd temlate radius corners only now parallel a line on template to outer radius say 20mm .

This is the rebate then 20mm internal and another 20mm for glazing.

Now cut template and sand internal line and outer so you are left 60mm hockey stick, draw outline of this on blank, cut internal rad and bobbin sand.

Now using router with sharp plunge rebate bit make a fence out of timber on end grain.

Round off and cut a rebate out of end just a bit bigger than the rebate required.

Now place over cutter, leave about 5mm of cutter protruding and mark the high point on fence, DO NOT TRY TO REBATE IN ONE PASS, SLOWLY PASS THE TIMBER THROUGH AND PUSH FENCE BACK UNTIL YOU REACH 20MM.

Now cut outer radius and vertical sander.

If you have got this far you should be competent to make a jig to hold it while you rebate the outer radius to 20mm.

Now try your handy work on first template.

Now cut a square edge on ends of radius pieces and trace onto first template leaving you with the measurement for the straights, which you can do on rip saw and cut to size.

Now putting together use a good quality 2pac epoxy glue and a brad gun to pin while drying, when dry sand the outer and inner edges then finish with a pencil round bearing cutter on router.

Note try to use teak if possible as it is soft and easy to work with.

I have explained this the best I can.

ALWAYS DO THE INTERNAL RADIUS REBATE FIRST ON ROUTER!

I hope this helps ,also the sizes for the rebates are a guide only just remember the outer rebate has to line up with the template to fit.


Porthole Frames
by: Mike

My frames aren’t glued at the corners, the through bolts hold them in place.

If you are going to use through-bolts then you don’t really need a very secure joint.

Dowels would be fine but getting them to align properly might be tricky across angled cuts, (unless you have a good jig).

One option would be to edge glue them but reinforce it with a spline set into a grove cut across the back of the joint.

Just an idea.


If your brass portholes are old the chances of finding the correct gasket are slim.

On the other hand if they are old then they were most likely made to last, unlike most of today’s offerings.

There are a huge variety of gaskets and gasket rubber for sale.

Try eBay or a car parts shop or even a double glazing shop and there are outlets such as ‘www.sealsdirect.co.uk’ that sell a wide variety of rubber seal and sheet.


Reply to portholes
by: Ben

Thanks that look good,

What type of mechanical joint would you suggest on a larger frame using this method?

I think some sort of splice joint would work.

I hope to fix from the inside so may secure the joint with a hidden dowel as well.

I have brass portholes and so hope to get them working again if any one knows where to get the gaskets from.


Circular Porthole
by: Mike

I agree solid that wood will be much better than ply.

This (very poor) photo is the only one I could find off hand of my only circular portlight.

I used the same trim as on the rectangular ones, approx. ¼ inch by 1¼, cut to form an octagonal frame.

If you did something similar with oversized pieces they could be shaped (curved) later (using a template).

Or even start with a hexagon then there will be less waste but that would be fiddly on a small opening.


Reply to mike
by: Ben

Thanks Mike,

I see you have a nice simple solution which done correctly will work and is similar to what we had in mind. I would however like a curved profile on the frames.

The only way I see to do this is to mechanically join and epoxy some oversize timber. (if the frame is to be 2x1 then the timber would probably be 4x1). Use this oversize frame then and cut out a frame to the shape required.

Off course we could use marine ply but we were hoping to varnish rather than paint.

This would be more costly and time consuming but do you think it would work?


Wooden Portlight Ideas
by: Mike

I don’t know of any good resources for making your own portlights.

"Boat Joinery and Cabinet Making Simplified" By Fred P. Bingham, has some ideas but hardly worth buying the book for, you can preview them here at Google books.

And there is a brief mention in "Buehler's Backyard Boatbuilding" By George Buehler.

You can see another idea for large ‘windows’ on Eddie Gregory’s "60s Sea Hawk".

Below is a photo of how I affixed my own, on "Mignonne".


I simply cut the acrylic to size with a one inch overlap and then through bolted them on the inside of the frame/cabin sides.

The wooden trim is both for looks and to spread the load of the through bolts.

A good dollop of sealant between the acrylic and the cabin sides has kept them drip free for several years now.

When sealing something such as these, spread the sealant evenly and then bolt/screw down lightly, when the sealant has cured, then, screw/bolt down tightly.

Making a watertight, opening porthole is another ball game, I've been on shiny new plastic boats with the latest, expensive, hatches and portholes which still have leaks.

P.S. Use either white or clear sealant rather than a dark one that will absorb heat/sunlight.


Click here to add your own comments

Return to Your Comments.

Want to add more photos?

Photo Uploader

If you are having problems uploading Photos or would like to add more click on this link for the Upload Form.


Show / Hide